- Getting started
- Admin CMS (Logos)
- Agencies
- Application & homepage
- Array helpers
- Articles
- Assets
- Best practices
- Branches
- Cookie consent
- Drops
- Events
- Forms (Custom)
- Lead forms
- Location guides
- Local Business Data
- Maps
- Nodes
- Pages
- Property searching
- Property results
- Property show page
- Staff
- Theme configuration options
- User profile system
- Valuations (Instant)
- Appendix
- Homeflow API gem
- 404s
Intro
Custom forms give the ability to create any form to be submitted to Homeflow. These are set up in your logos admin panel by clicking the “forms” sidebar item. More information on Logos here.
Here is an example of how a custom form can be rendered with liquid:
  <form action="/form_submissions" method="post">
    {% email_message_form, name : guaranteed_rent_form  %}

      <input type="hidden" name="f_id" value="{{html_form.id}}">
      <input type="hidden" name="redirect_url" value="/">

      {% for el in html_form.form_elements %}
        <label class="text" for="{{ el.element_for }}">{{ el.element_label }}</label>
        {{ el.element_html }}
      {% endfor %}

    {% endemail_message_form %}

    <input type="submit" value="Submit">
  </form>
Fields first_name, last_name and email are required fields on all custom forms.
Note that you will require the form ID to be passed and the redirect_url for the page on completion of the form submission.
If you have no access to the liquid theme then you can include a custom form by first creating a theme content chunk with the form code as one would in the theme, then create a page in pages that calls the content chunk, like so,
  {% content_block contact_us_form %}
    {% if content_block %}
      {{content_block}}
    {% endif %}
  {% endcontent_block %}
And viola, you’ll have your custom form!
Form fields
Once logged into Logos, navigate to “Forms” from the sidebar menu. You can now add new forms with the “new form” button or edit any existing forms that might already exist.
In the form edit page you will note the “form elements” tab. This is used to define all the form elements for a form. You can add as many form elements as you wish, and we cater for almost all combinations of elements. If you think we have missed any elements please drop us a line!
Field options
Some form elements such as dropdown’s can accept multiple values. You can define these with tab separation in the field options for that element. e.g. ‘TV|Radio|Internet’
File uploads
We also allow file upload elements for custom forms (foolish perhaps?). These can be defined by picking an input with type “file” in the form fields section for a form in Logos.
For custom forms with attachments you will need to add enctype=”multipart/form-data” to the form tag like so:
<form class="my_class" action="/form_submissions" method="post" id="custom_form" enctype='multipart/form-data'>Client Bookings
You can create form bookings using the custom forms field options. For example;
Friendly Name='Would you like to book a viewing?', Field Tag='input', Field Type='radio', Field Options='Yes|No'
Friendly Name='Booking Day', Field Tag='select', Field Type='string', Field Options='Monday|Tuesday|Wednesday|Thursday|Friday|Saturday|Sunday'
Friendly Name='Booking Time', Field Tag='select', Field Type='string', Field Options='09:00|10:00|11:00|12:00|13:00|14:00|15:00|16:00|17:00|18:00'

And these will render out like a normal form.
Form Templates
Here is an example of a formatted custom form.
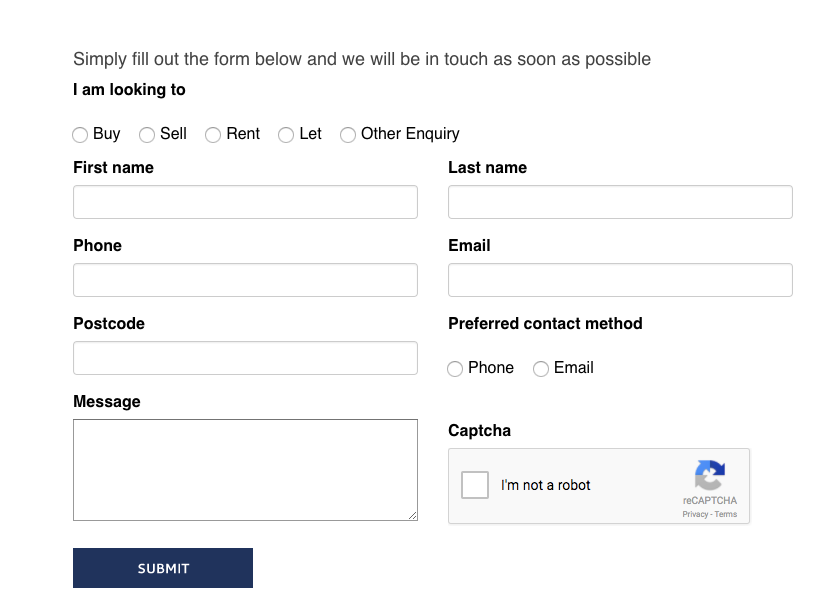
If you would like to use this form please refer to the code linked Here.
Once the text has been copied and pasted into a new content_block named “contact_us_form”, It can then be called in the source code of the required page.
  {% content_block contact_us_form %}
    {% if content_block %}
      {{content_block}}
    {% endif %}
  {% endcontent_block %}
Remember to change the value of the first input to the custom form ID number that is generated when the form is created in logos(i.e 289), and to change the second inputs value to the necessary Url (i.e /test).
<form action="/form_submissions" class="enquiry-form" id="contact_form" method="post">
	<input name="f_id" type="hidden" value="{ custom form ID }" />
	<input id="hidden-redirect-url" name="redirect_url" type="hidden" value="{ url for testing page }"/>
To change any of the forms styles simply add a class to the parent element and add the prefered styles within the pages custom css.
- Getting started
- Admin CMS (Logos)
- Agencies
- Application & homepage
- Array helpers
- Articles
- Assets
- Best practices
- Branches
- Cookie consent
- Drops
- Events
- Forms (Custom)
- Lead forms
- Location guides
- Local Business Data
- Maps
- Nodes
- Pages
- Property searching
- Property results
- Property show page
- Staff
- Theme configuration options
- User profile system
- Valuations (Instant)
- Appendix
- Homeflow API gem
- 404s